Your all-in-one guide to using Gmail labels for inbox management
In 2022, over 333 billion emails were sent globally—a massive number, but not that surprising. As people struggle to organize their overflowing inboxes to reduce clutter, manual email management has become a significant time sink and source of stress.
To help manage this, Gmail offers several inbox organization tools, one of the most useful being labels. By applying labels to specific emails, you can sort crucial emails into accessible locations, ensuring your emails never fall through the cracks and your inbox remains organized.
In this comprehensive guide, we will explain everything you need to know about creating and using Gmail labels for more effective email management.
What are labels in Gmail?
A Gmail label is a tag you can attach to emails for better inbox organization, making it easy to find specific conversations. Each label has an arrow-like icon that you can color-code for quicker identification.
Depending on your chosen criteria, you can categorize emails in several ways by applying multiple labels to a single email.
For example, a recruiter might label an applicant's email with multiple labels, such as Project Manager job ad, Applicants 2025, and Final stage interview for quick access.
How do labels in Gmail work, and are they different from folders?
Many email services use folders to organize messages, moving emails out of your primary inbox and storing them in a separate location. Gmail, however, does not have a traditional folder-like system. Instead, it only uses labels, which act more like tags applied to emails than separate containers.
Check out the table below to grasp the key differences between Gmail labels and traditional folders:
Feature | Labels | Folders |
Functionality | A tag that can be applied to emails | A designated location where you move emails |
Location | Emails can have multiple labels and remain in the inbox | Emails are removed from the inbox and stored in a single folder |
Flexibility | One email can have several labels, offering more flexibility | One email can only exist in one folder, limiting flexibility |
Here’s a practical illustration:
Say you have an urgent email about Project Acme from Client XYZ. You can apply the three labels: Project Acme, Urgent, and Client XYZ to one email. If you open these labels on Gmail’s left sidebar, you’ll find the email in each of them.
On the flip side, the traditional folder feature on other email platforms will only let you file the email within one folder. If you place the email in the Project Acme folder, you can’t have it anywhere else. To see the email in the Urgent folder, you’ll need to move it from Project Acme to the Urgent folder.
How to create a new label in Gmail
Creating a new label in Gmail is straightforward, and you can achieve it in two ways, depending on your workflow. The methods include:
With the Create new label button
Inside an email
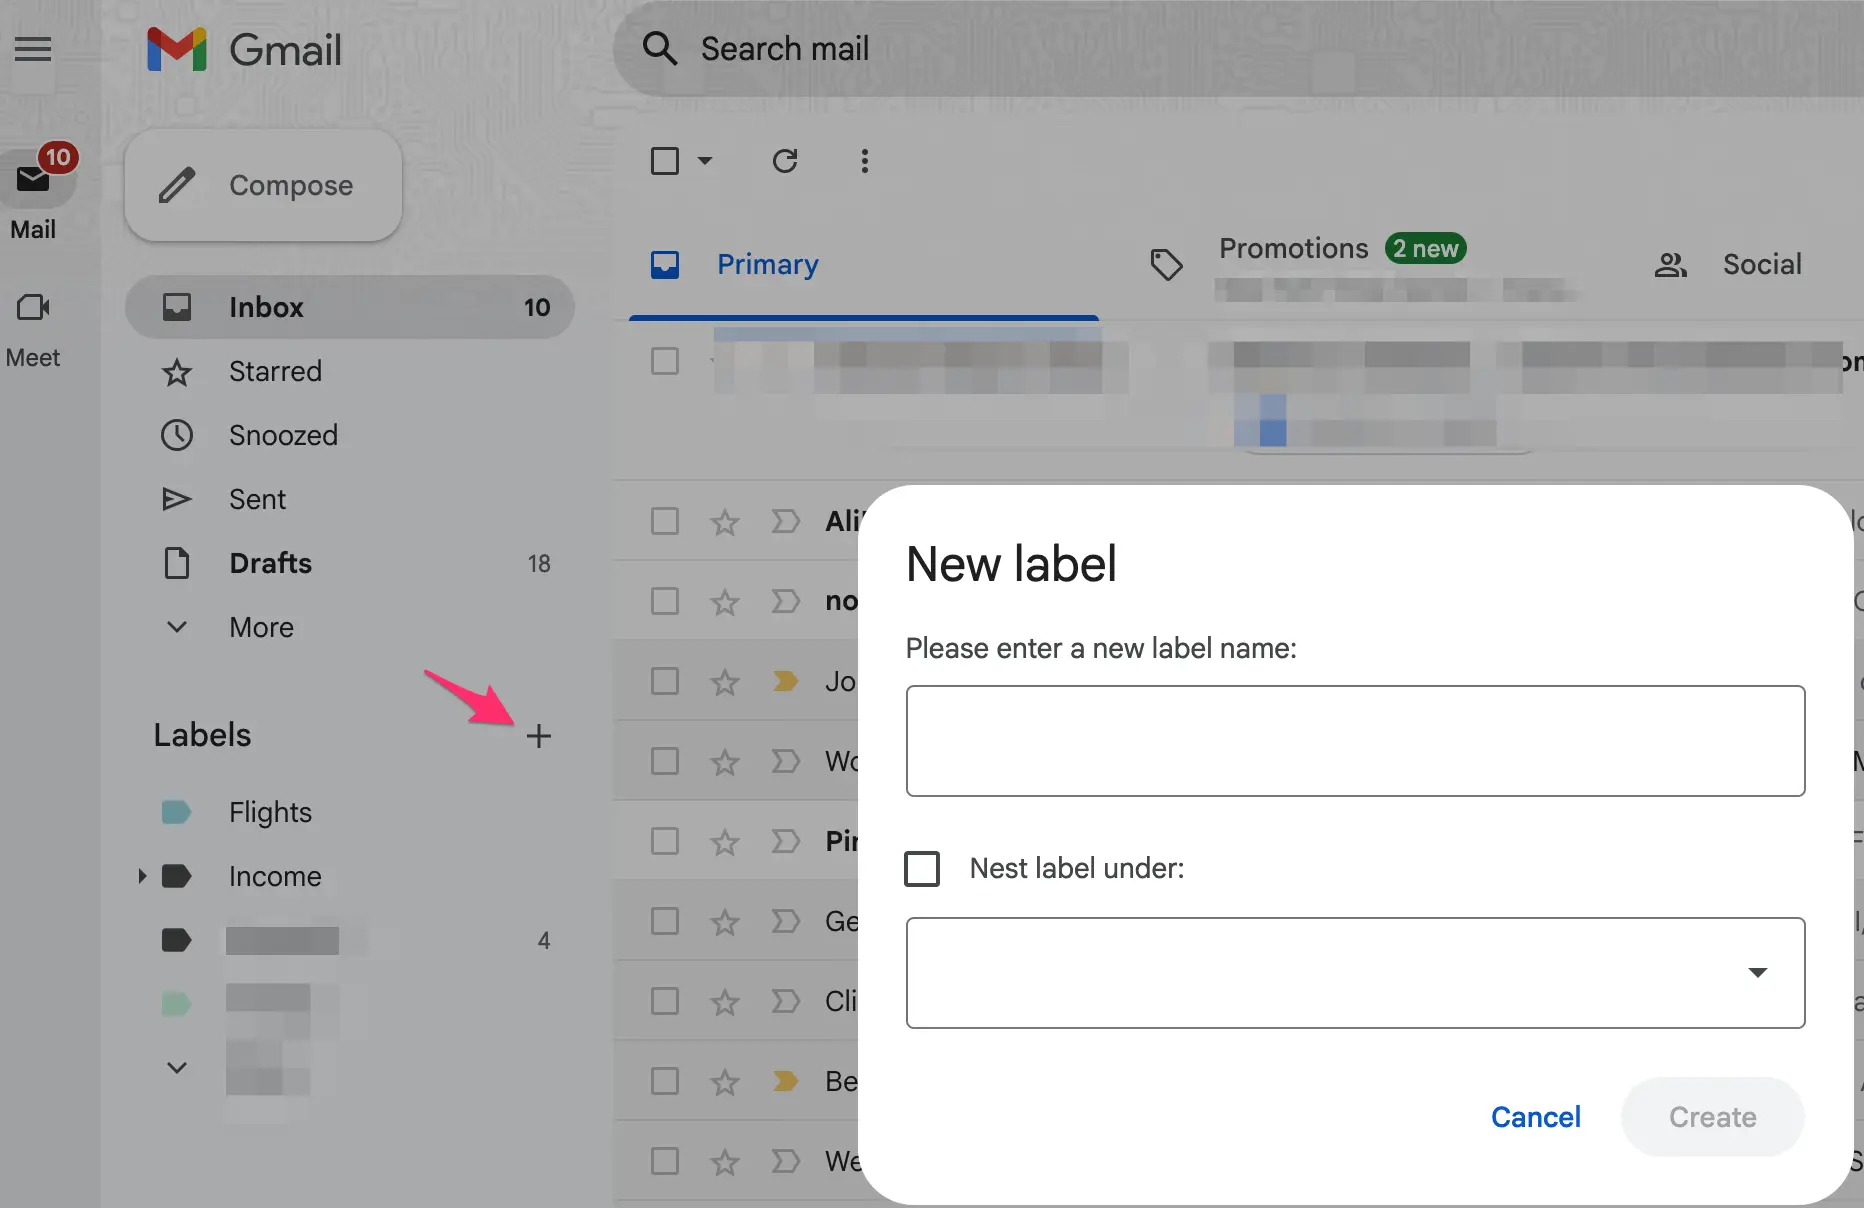
Here’s how to do it using the Create new label button:
Open Gmail on the desktop
Navigate to the left sidebar and look for the Labels section
Click the plus + icon and give your new label a name
Click Create
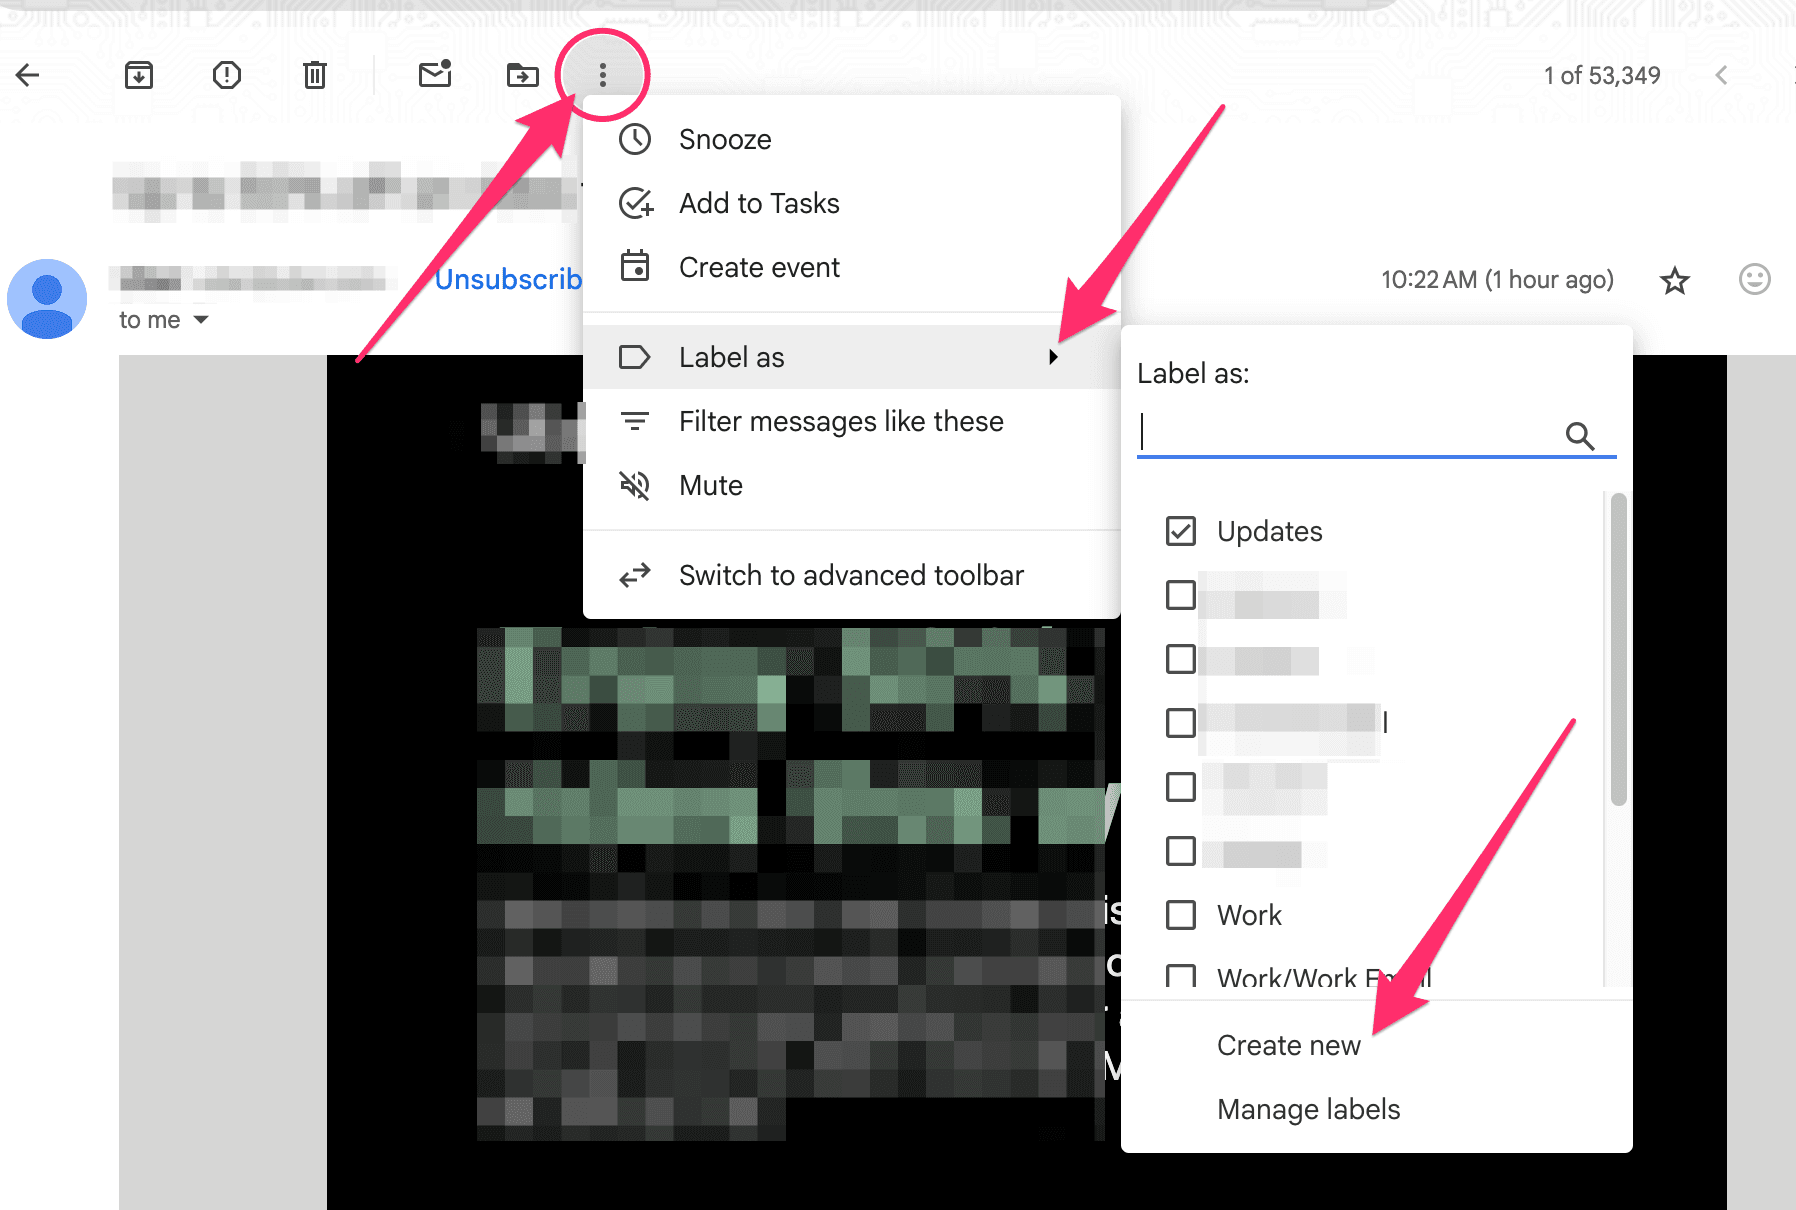
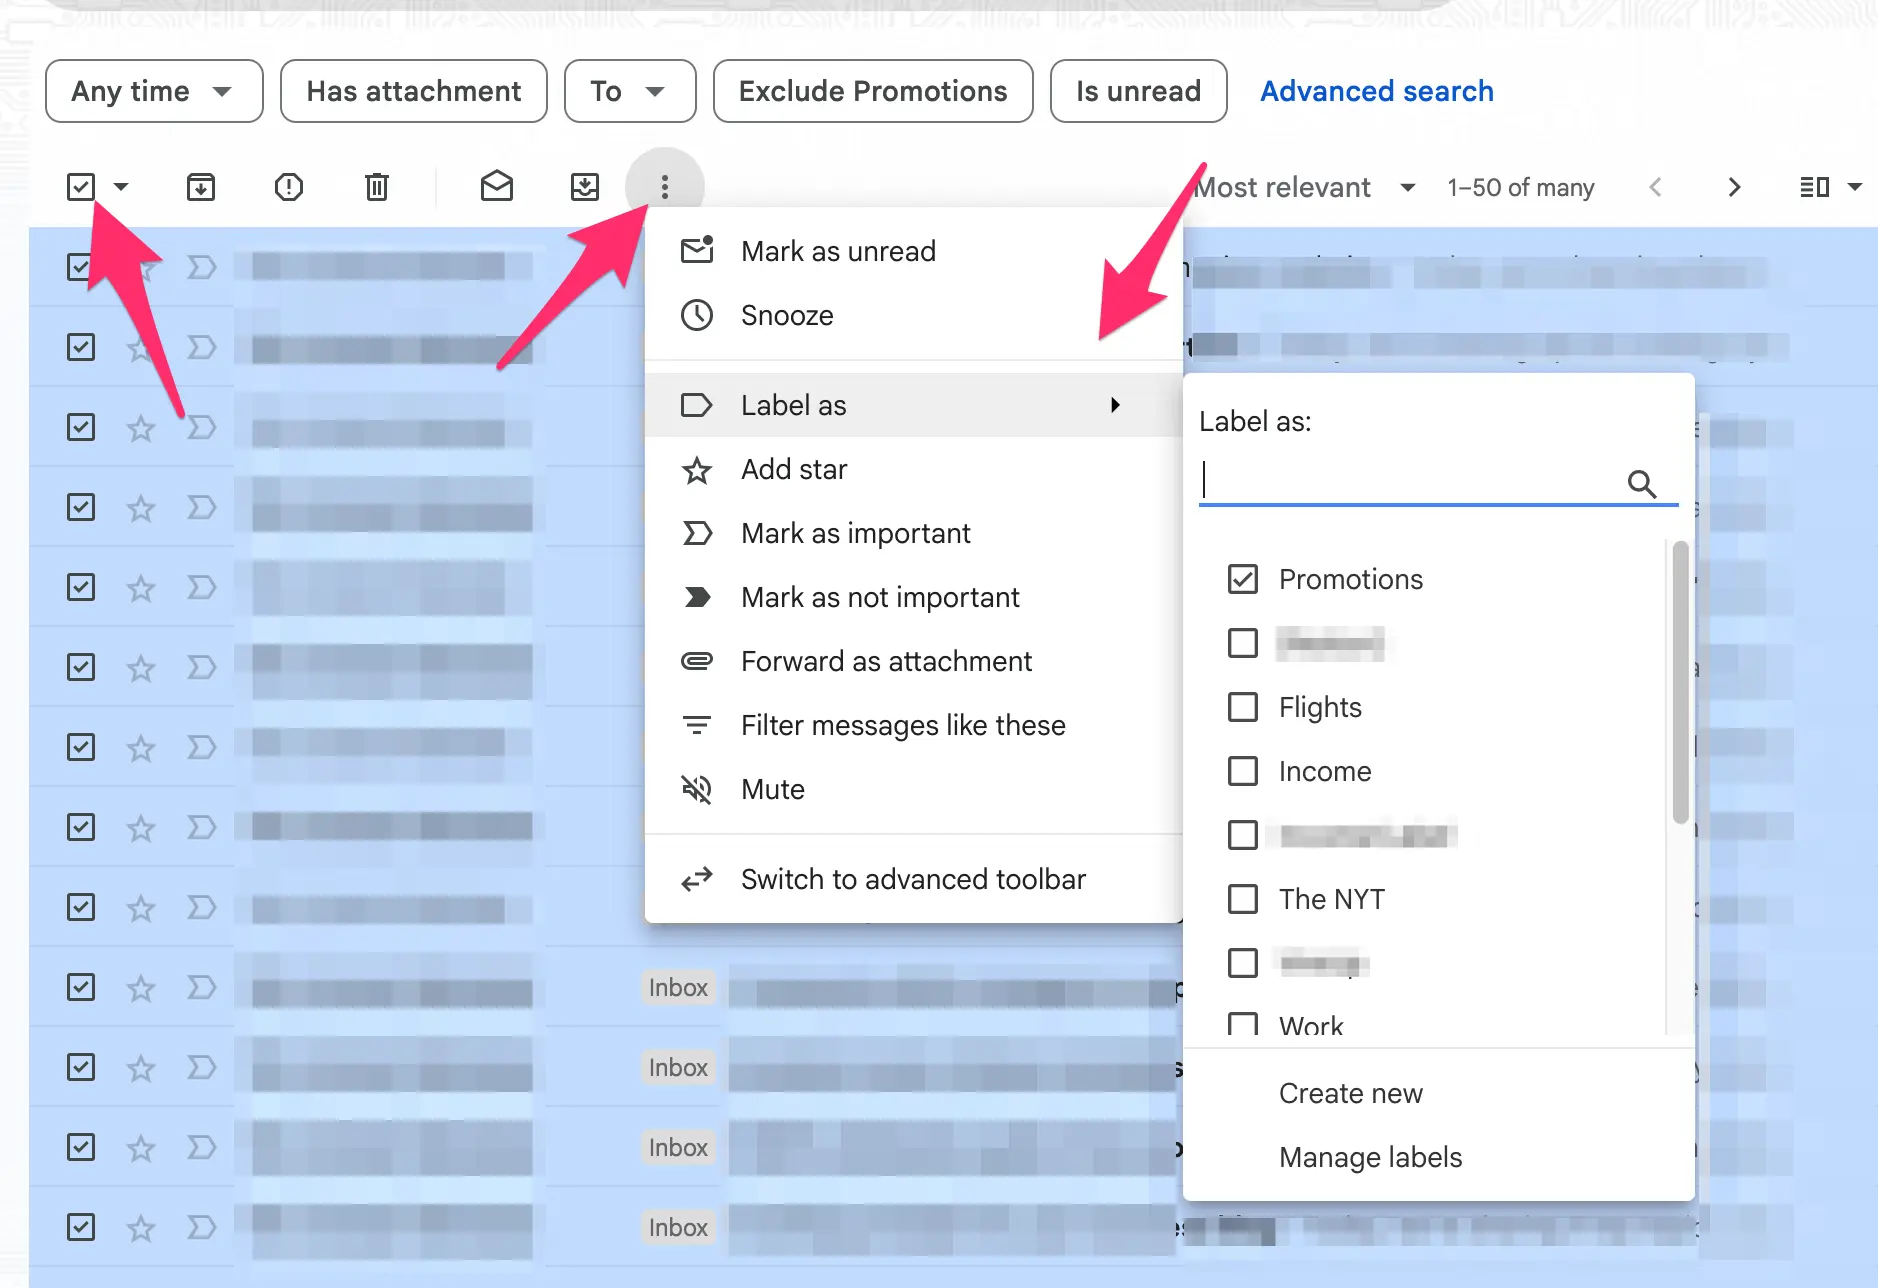
To create a label inside an email, take these steps:
Open the email you wish to label
Click the ellipsis icon at the top of the screen
Scroll down and click Label as in the drop-down list
Select Create new at the bottom of the list, then give your label a name
Click Create to finish the process
To access your newly created label, navigate to the left sidebar, and you’ll see it under the Label section. Click on the label to find the emails to which you’ve applied the tag.
How to add emails to labels in Gmail
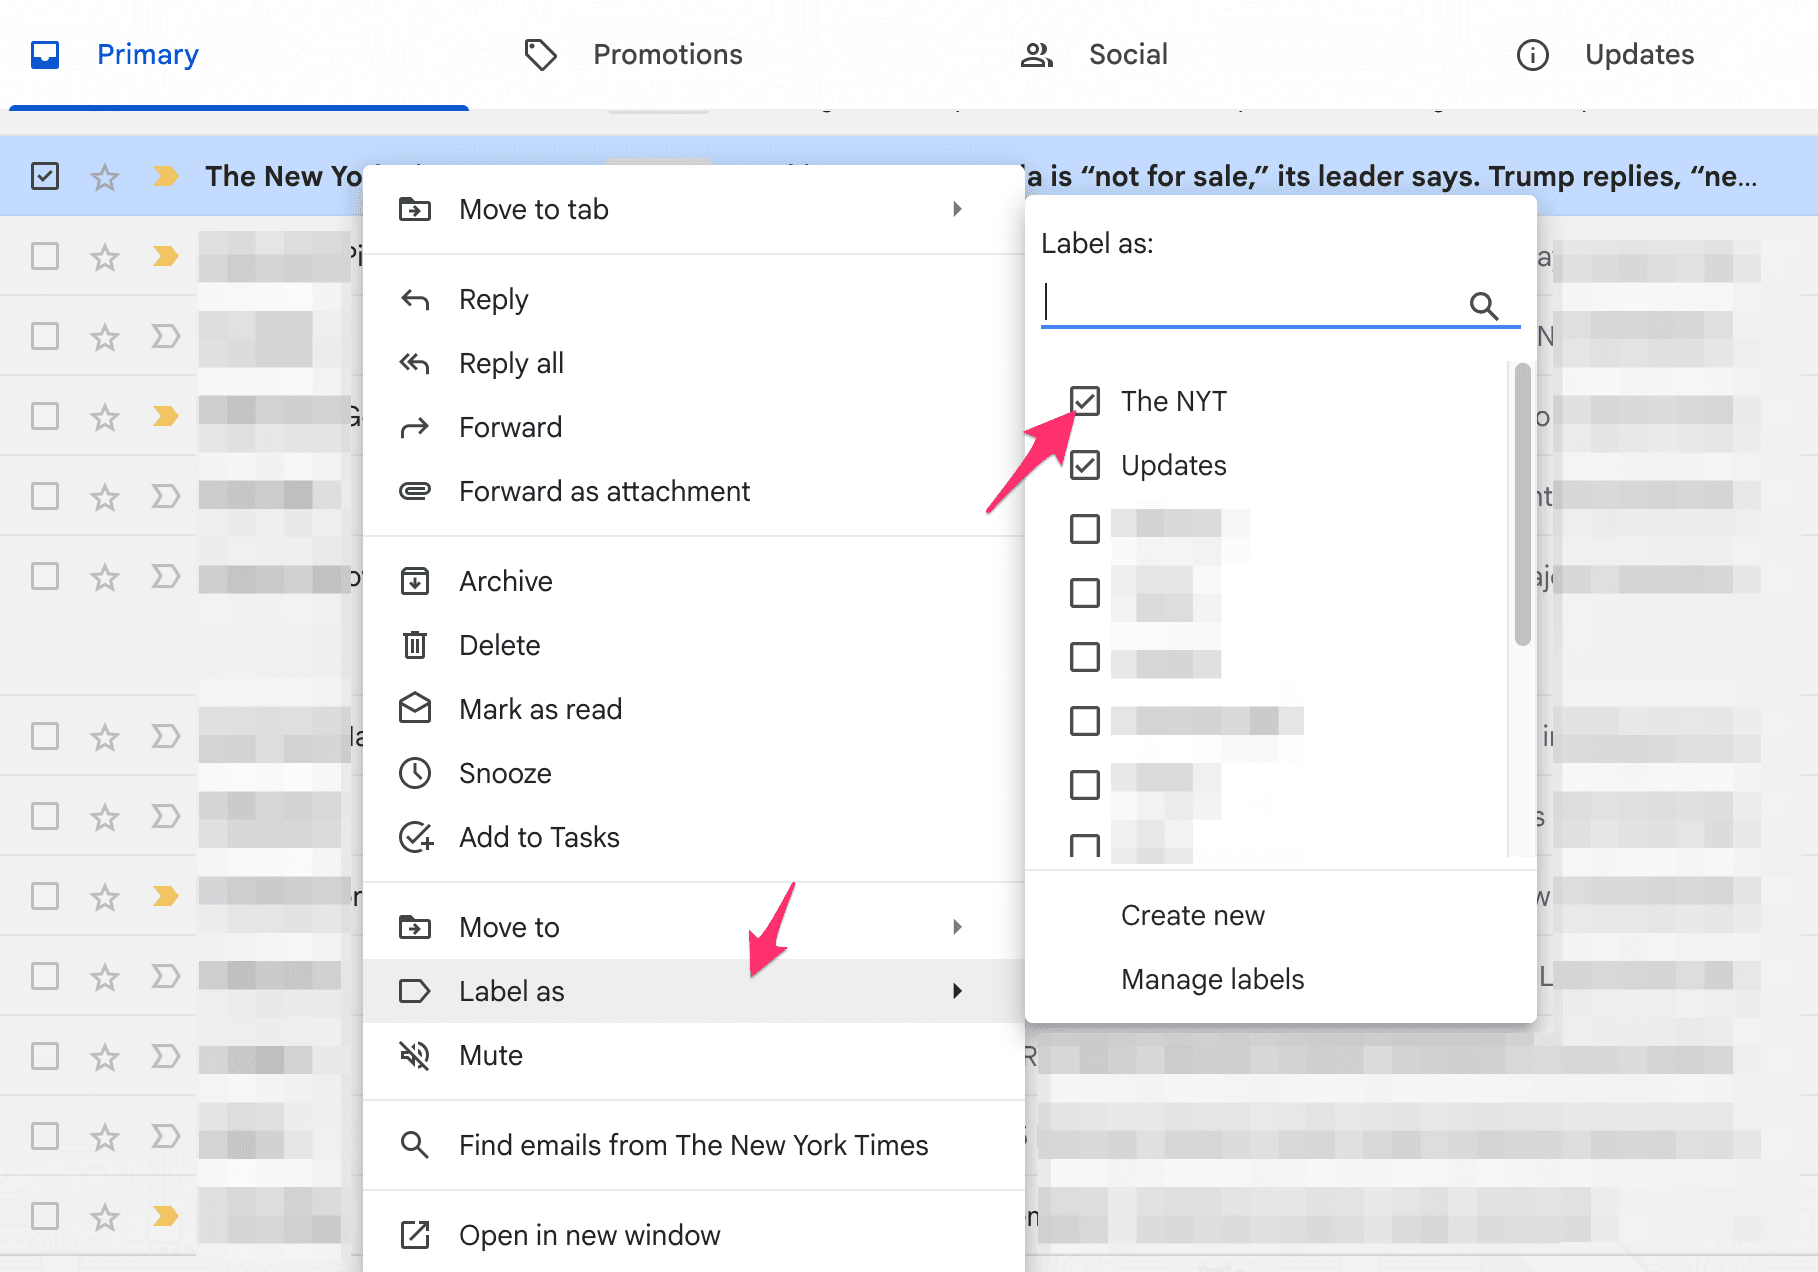
After the label is created, you can add emails to it in bulk or individually. Here’s how to add emails to a label individually:
Locate and right-click the email you want to label
Navigate the drop-down list until you see the Label as option
Click on the Label as option and select any of the existing labels on the list
The email will automatically be added to the label, and you can find it in your label list.
How to label multiple emails in Gmail
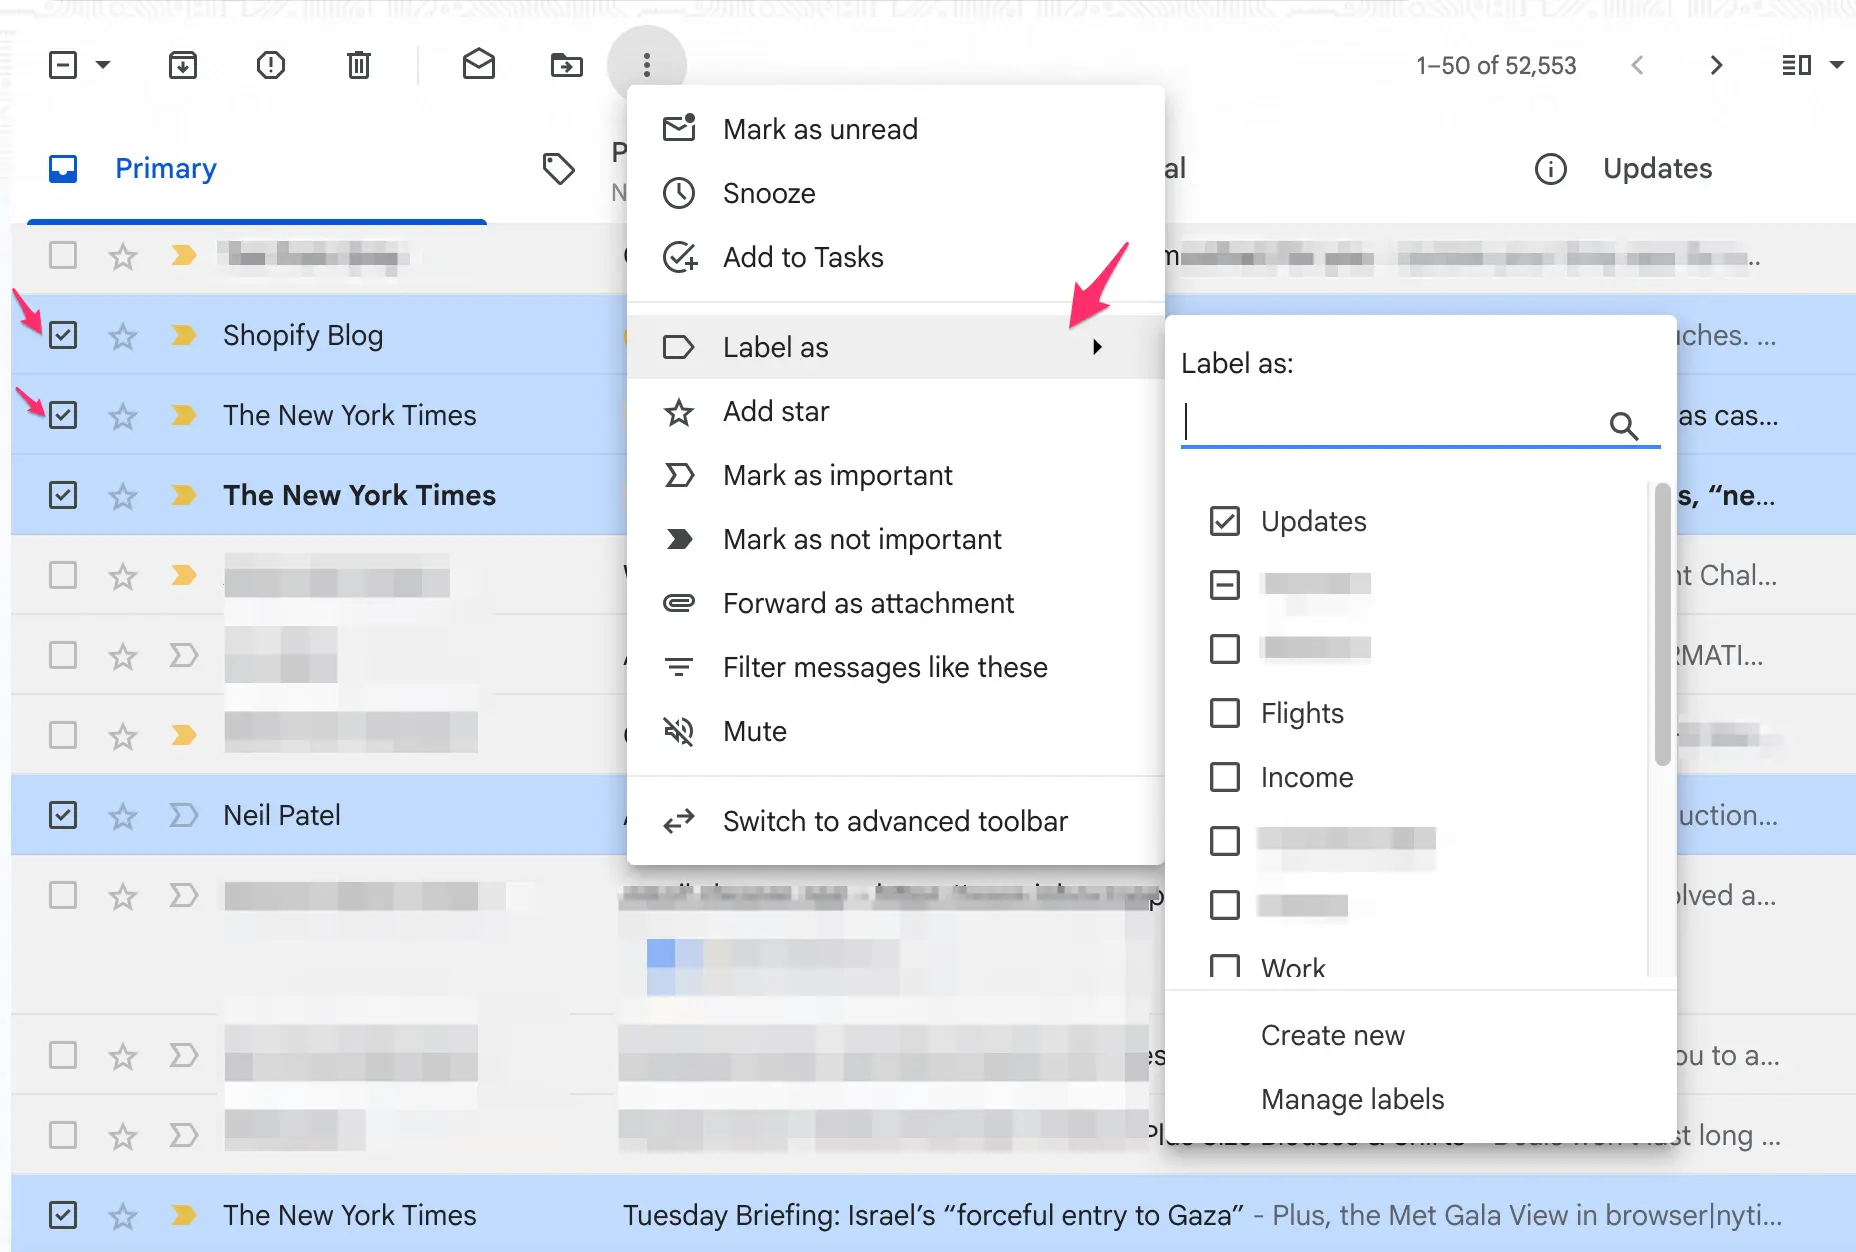
To add multiple emails to a label, take the following steps:
Select all the items you want to add using the check box on the left side
Click the ellipsis icon at the top of the Gmail home screen
Navigate to the Label as option and click on it
Select your preferred label to add all the emails to it
If you want to organize your emails by specific criteria, such as sender, subject, date, etc., you’ll first need to sort out the emails and then apply the desired label. Here’s how you can do that:
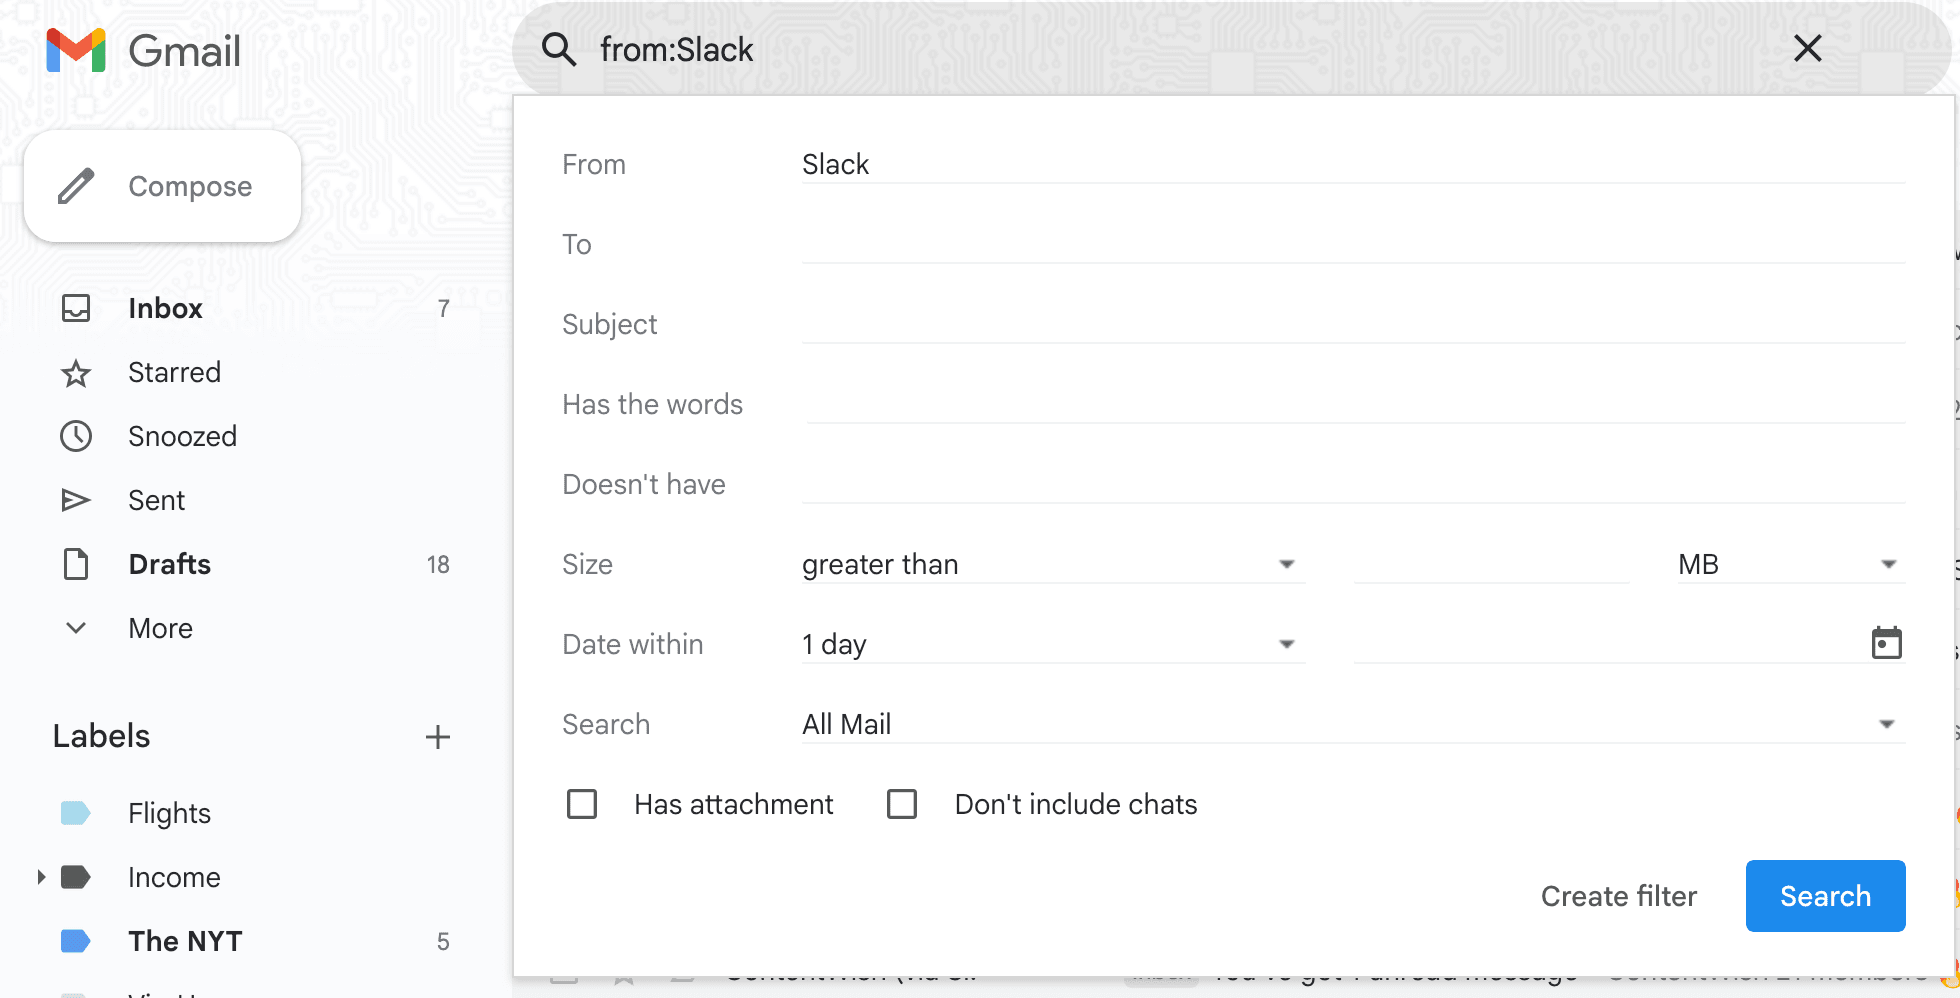
Click on the three-slider icon in the search bar to find the target emails
In the search panel that pops up, type out the sender’s name in the “From” field
Click the Search button to view all emails from that sender
Click on the topmost check box to select all the emails from that sender
Hit the ellipsis icon that appears and then Label as
Select your preferred label and click Apply
This bulk method can also be used to label multiple emails with similar subjects, recipients, keywords, and more.
How to create a nested label in Gmail
A nested label is a sublabel that’s categorized under a parent label. They’re great for granular sorting of your emails, especially if you’re using a shared inbox and need to assign tasks to each team member under a parent task.
For instance, you can create a parent label called Customer Requests and create nested labels for each team member, assigning different customers’ emails accordingly.
To create a nested label, try any of these options:
Turn an existing label into a sublabel
Create a new sublabel
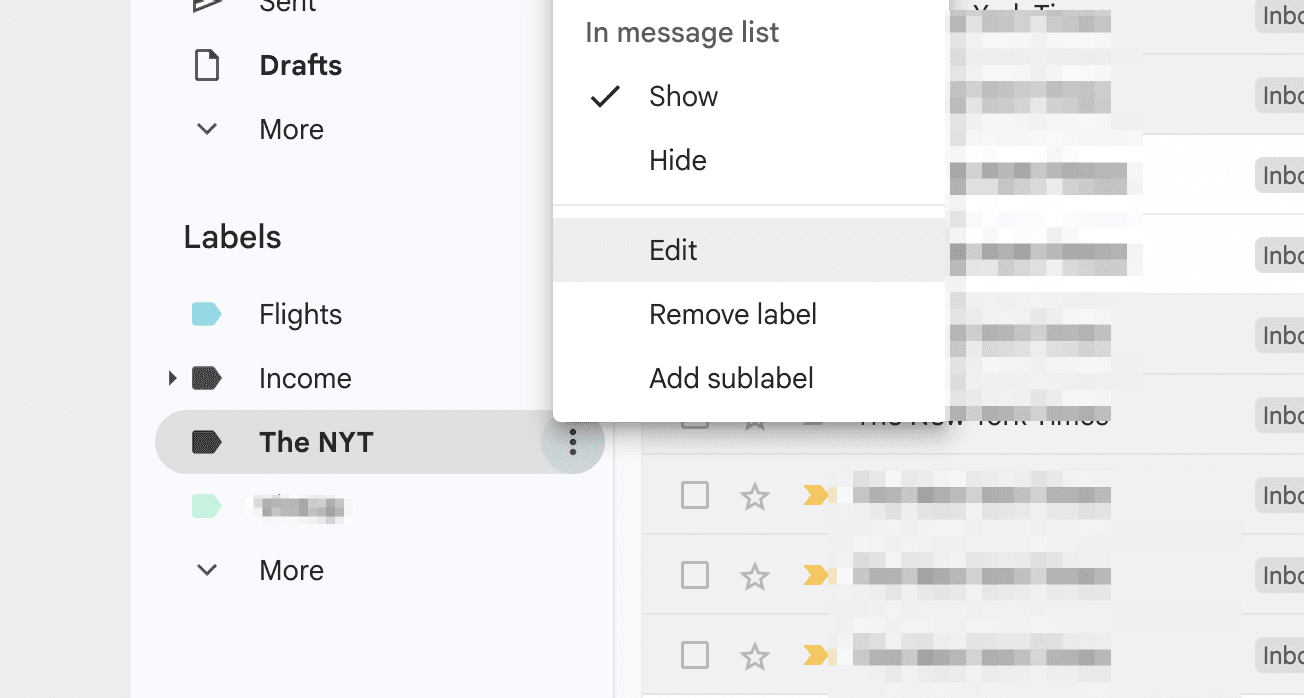
Option A: Turn an existing label into a sublabel
Step 1: Click the ellipsis icon beside the label name in the left sidebar
Step 2: In the drop-down list, select Edit
Step 3: In the panel that pops up, tick the check box next to the Nest label under option
Step 4: Click the down arrow in the empty field and choose a parent label
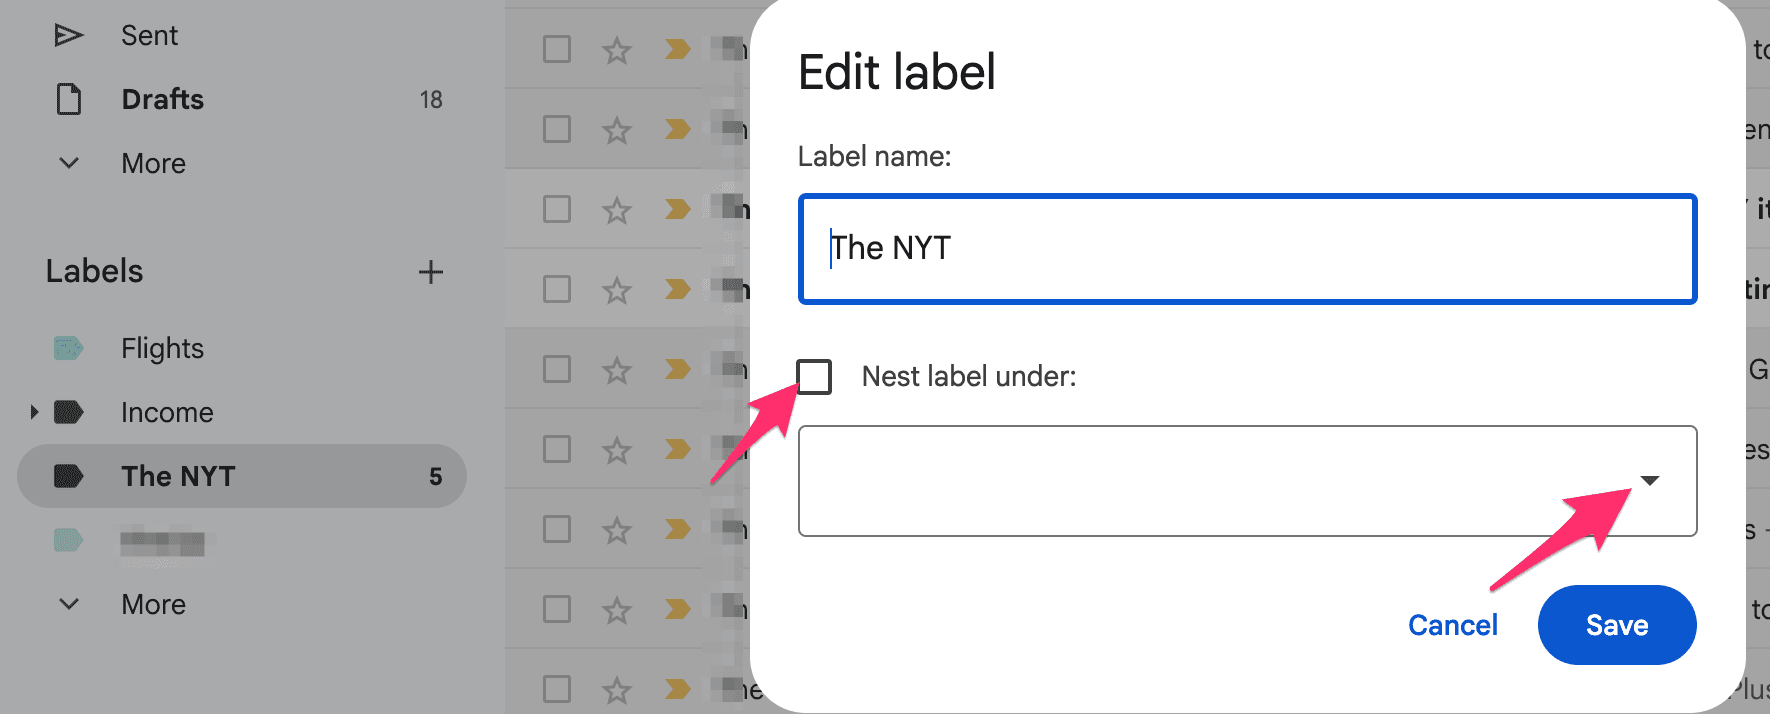
Step 5: Click Save to finish the process
Option B: Create a new sublabel
Step 1: Click the ellipsis icon next to the parent label in the left sidebar
Step 2: In the drop-down list, choose Add sublabel
Step 3: A pop-up will appear, allowing you to add a new sublabel
How to modify a label in Gmail
You can refine the name, change the color of the Gmail label’s icon, and decide where you want the tag to show in your email view. To modify your label, do the following:
Open Gmail and navigate to the Labels section
Hover over the label you want to edit, then click the ellipsis icon that appears
Navigate downward and click Edit if you want to change the label name
Navigate upward and click Label color if you want to give your label a new color
You can also explore the other settings on the drop-down menu to modify your label.
How to search within Gmail labels
Searching within labels helps you narrow down results more precisely. For example, if you look for the keyword “flu” using a regular search, Gmail will display a list of all the emails in your inbox that contain that term. However, if you search within a specific label, you’ll only see results from that labeled group.
Here’s how it works:
Step 1: In the search bar, type in the query “Label: label_title,” e.g., Label: Work

Step 2: Hit Enter and wait for the list to appear
Step 3: In the search bar, right after the label name, press the spacebar and enter keywords related to the email you’re looking for
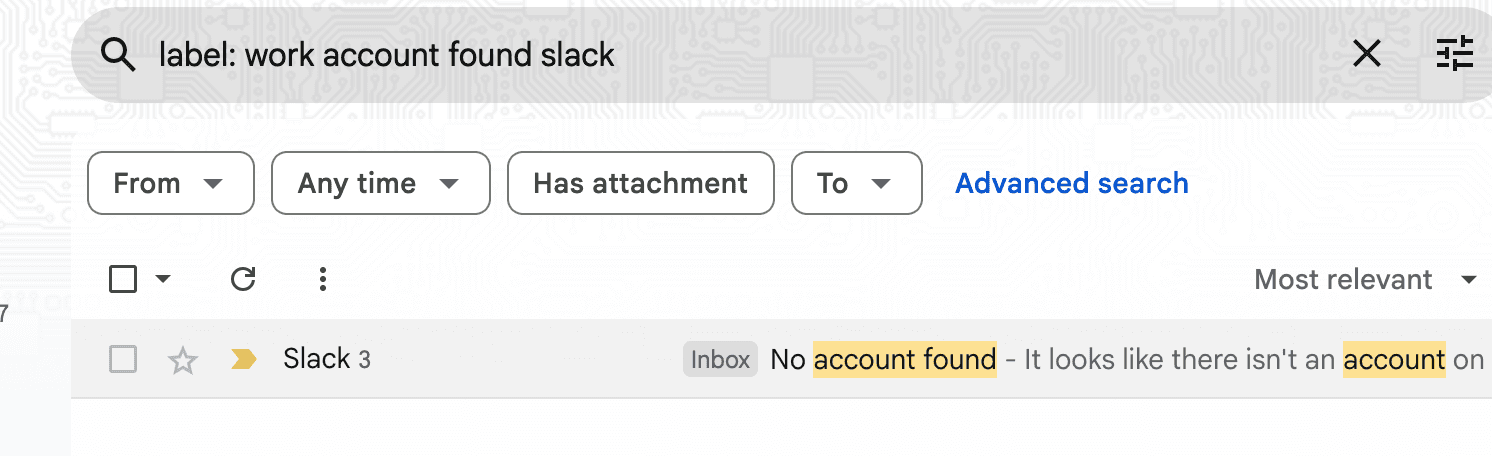
Step 4: Press Enter, and a smaller list will appear with emails containing the relevant parameters
How to automatically label emails in Gmail
Manually applying a label whenever a new email enters your inbox can quickly become cumbersome. To streamline the process, Gmail offers filters—a handy way to auto-apply labels to incoming emails. Once your automated filter rule is set up, messages that match the parameter will be filtered into the right label category.
Here’s how to set up a filter on your desktop:
Step 1: Open Gmail and click the three-bar icon in the search bar
Step 2: Type your search criteria to identify emails you want to label automatically. This can be the:
Sender (From)
Recipient (To)
Subject
Keywords, etc.
Step 3: Click Create filter
Step 4: Tick the check box beside Apply the label, and then select the label you want to use in the drop-down menu
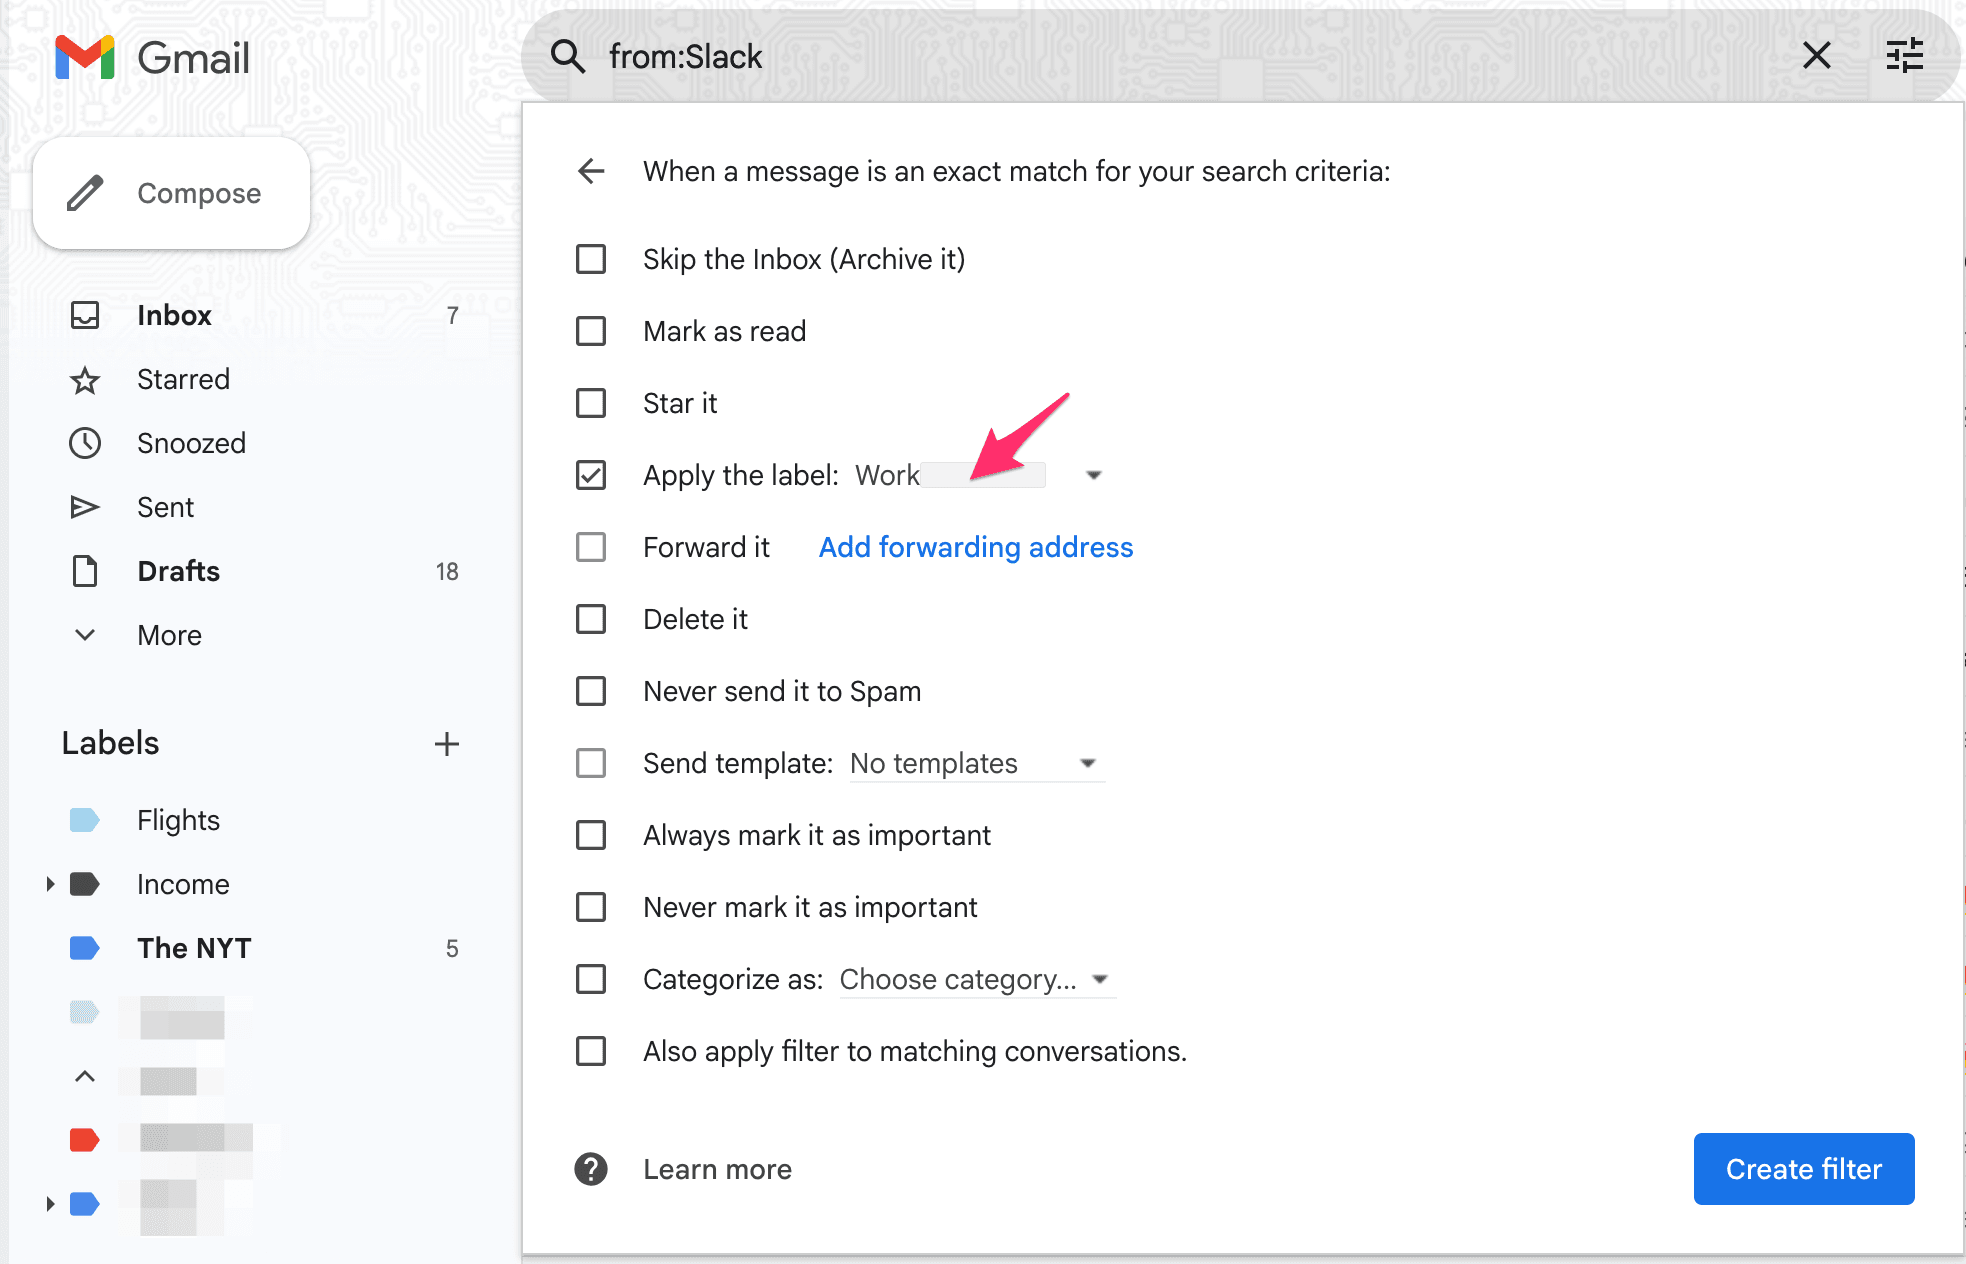
Step 5: If you want the filter to perform other actions, like forwarding the email or deleting it, select the action from the menu
Step 6: Click Create filter to complete the process
Are Gmail’s label features sufficient for your inbox organization?
Gmail’s labels provide a foundational way to categorize emails, offering a more detailed level of organization beyond the default chronological inbox view. However, many users have found that relying on labels can still pose significant challenges in achieving the level of “inbox zen” they need.
Some common limitations users have reported include the following:
Gmail’s interface can become confusing when emails appear in multiple label locations, which makes it difficult to curate a clear view of their workflow.
The platform’s filtering features can sometimes be unreliable, leading to important messages being buried under unwanted clutter and users missing deadlines and opportunities.
These challenges highlight the limitations of relying solely on manual labeling and basic filtering. You find yourself spending more time and effort micromanaging your inbox, creating and applying labels, and setting up complex filter rules instead of focusing on your key tasks.
If you’re looking for a solution to streamline these inefficiencies within your Gmail workflow, Notion Mail offers a powerful alternative with AI-powered automation. It’s a dedicated Gmail client that leverages features like AI auto labeling and smart automation to bridge these common management gaps, transforming your overall inbox experience.
Notion Mail: An easier path to peak inbox organization

Notion Mail is an AI-native email client designed to provide a more intuitive and efficient way to manage your inbox. Instead of relying solely on manual sorting and complex filters, the platform leverages AI to automate cumbersome and time-consuming labeling tasks, helping you boost your overall email experience.
If you’re a busy professional who deals with a high volume of emails and values streamlined workflows and a clutter-free inbox, you’ll find Notion Mail a game-changer.

Here’s how its advanced automation features can help boost your inbox organization:
Feature | How it works |
Intelligent AI-powered auto labeling | Notion Mail’s AI auto labeling feature automatically sorts and prioritizes your emails into specific labels based on simple AI prompts—no need for complex filters. It learns your workflow over time and automatically categorizes your incoming messages. |
Customizable views | The platform lets you create tailored inbox views based on your specific projects, clients, or priorities, only showing you emails you need to see without distractions. |
Beyond organizational enhancements, Notion Mail also offers valuable features like:
AI-writing assistant for generating smart reply suggestions or drafting emails from scratch
Notion Calendar for seamless meeting scheduling without conflict
Email summaries for quicker understanding of long threads
Automated follow-up reminders for maintaining crucial communications
How to get started with Notion Mail
Making a Notion Mail account is a breeze—connect your existing Gmail or Google account to access the platform. It’s free to use, with many advanced tools available upon signing up. If you want to explore more enhanced AI automation features, you can get the Notion AI add-on.
Bonus read: We have some more helpful email management guides and tutorials for you:
